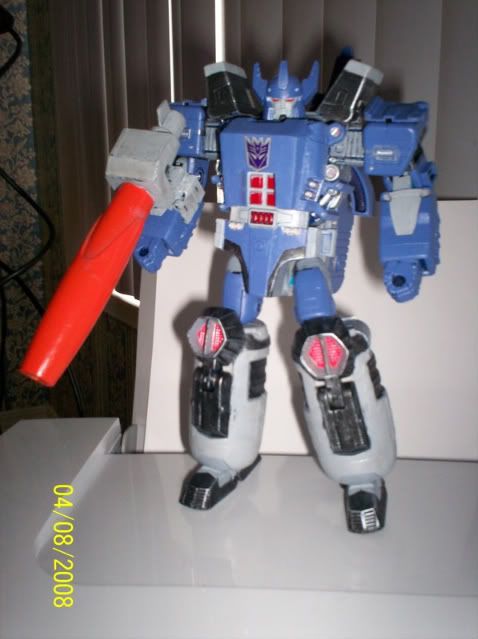
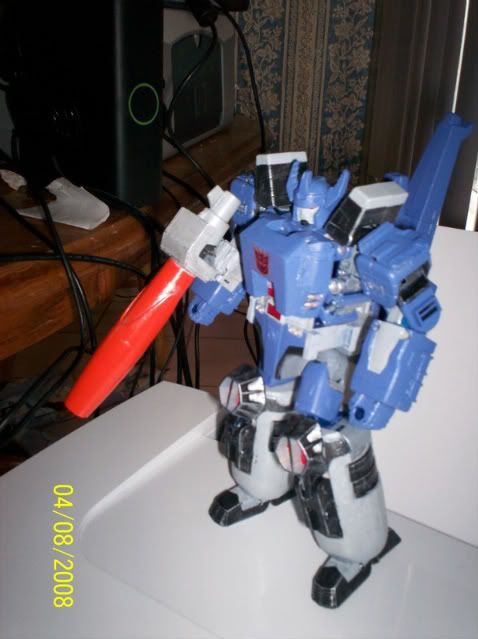
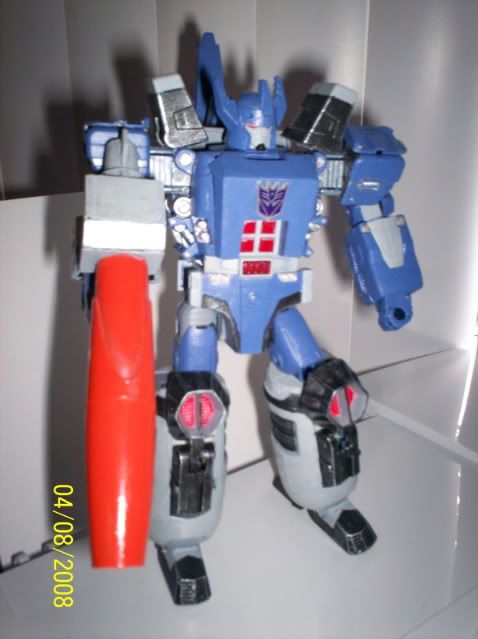
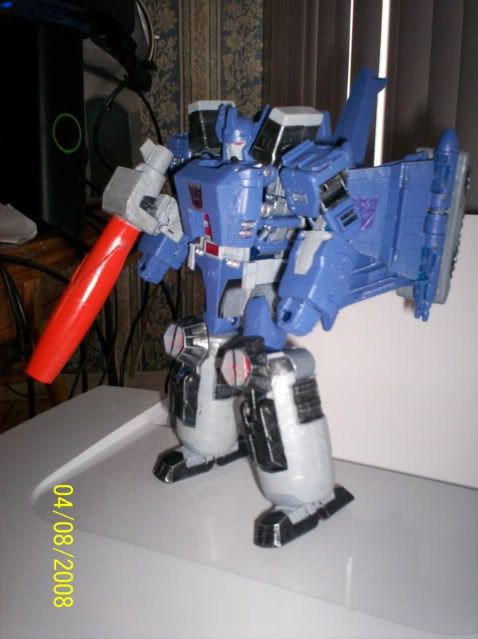
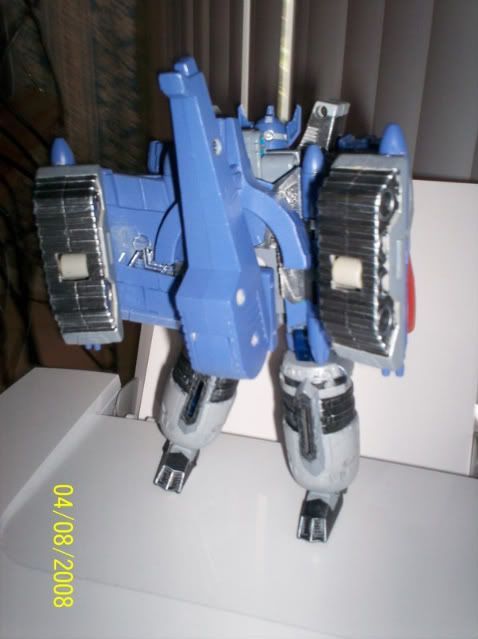
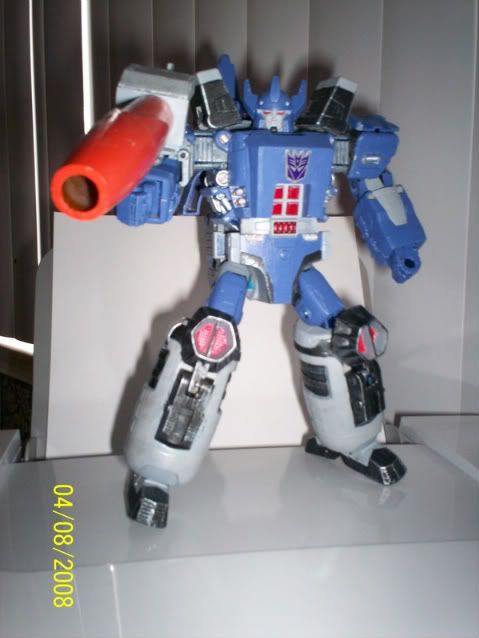
Classics Galvatron
Posted: Tue Apr 08, 2008 10:27 pm
Hope you guys enjoy it--I worked hard on getting this thing just right.
Here's a quick run-down on what I used and what I did:
1) Paint (Testors Acryl Blue, Black Flat, Orange Gloss, Red Gloss, Light Ghost Gray, Silver Gloss, Gray, & a dark gray I mixed up.
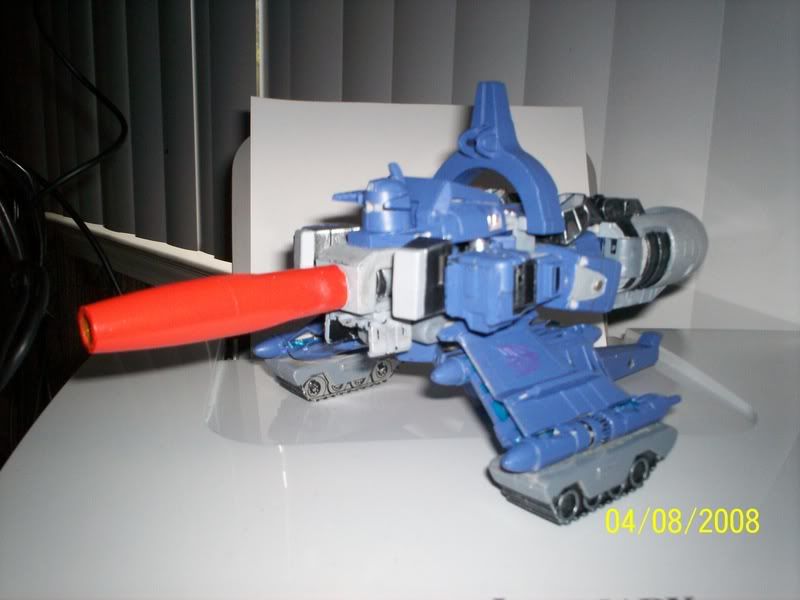
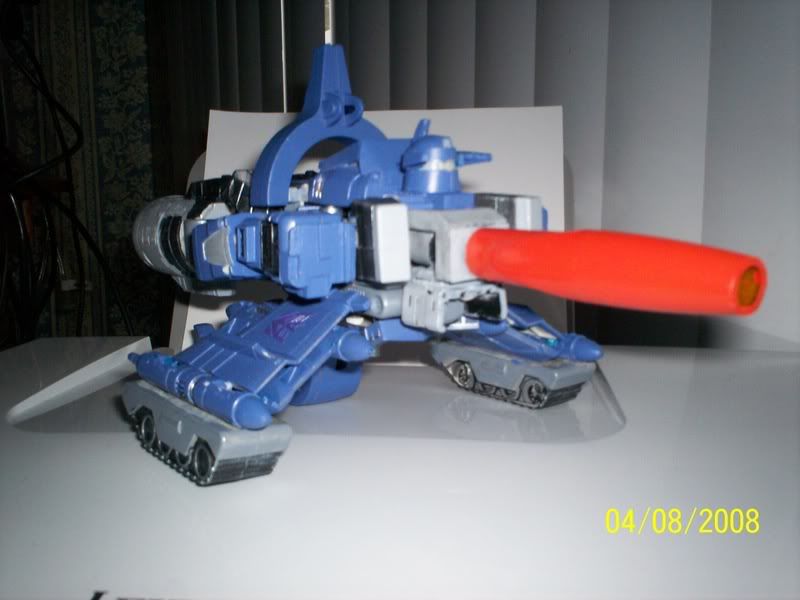
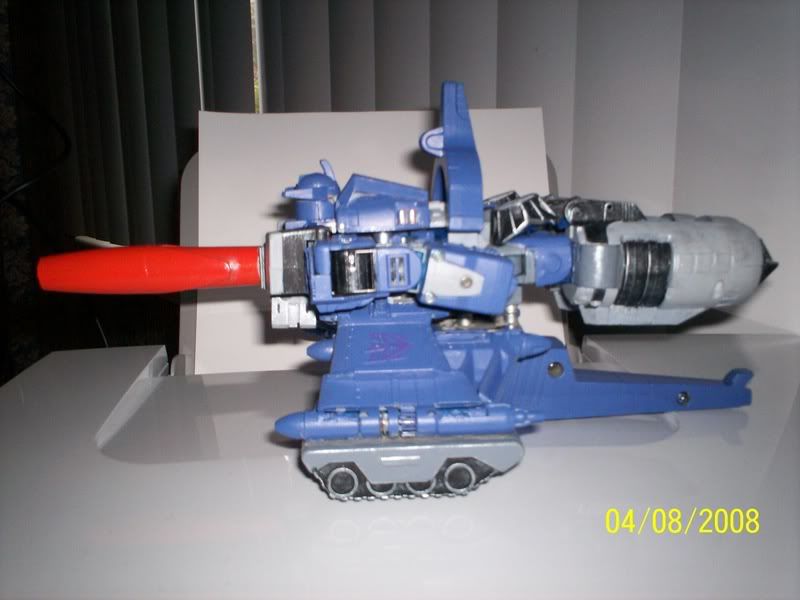
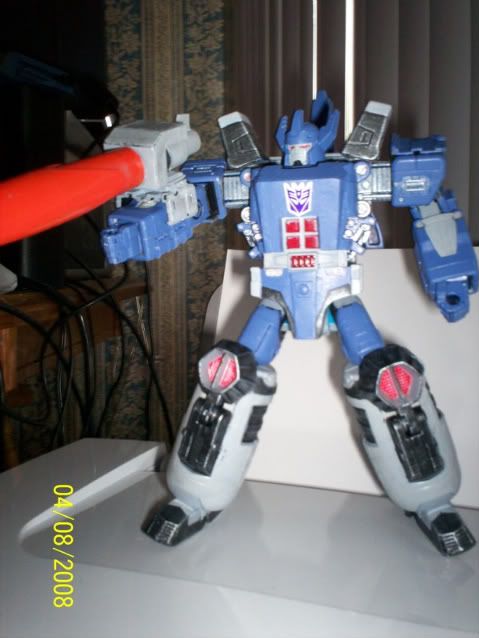
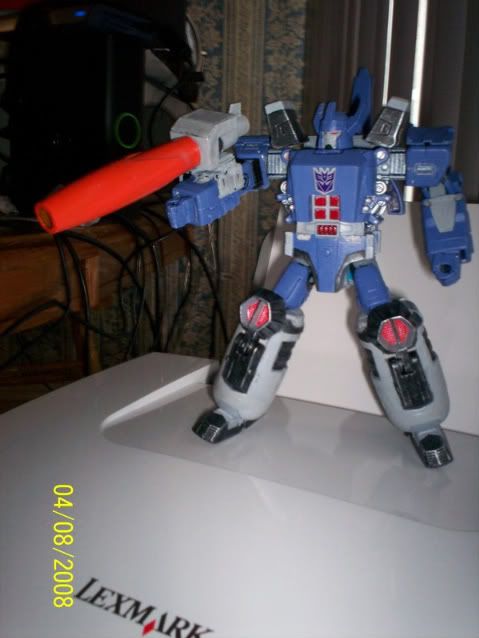
2) For the G1 arm cannon, I used the back end of an oversized Bic pen (cut down and glued so you couldn't "click it" anymore). I used my dremel to cut the pieces off the bottom of the Energon Megatron electronic tank/cannon so that they could still "snap" into his arm. I glued them to a small piece and mounted the hacked up pen (well, the back end of it). I proceeded to go through 3 different arm cannons--two of which were created from various pens and the third. The 3rd and final cannon may look familiar--I took G1 Galvatron's arm cannon and cut off the end that used to slide into his head in alternate mode, then trimmed the other end of the cannon a bit so it wouldn't look too long or big. I considered keeping the G1 look to it (the clear/sparkly orange, but it didn't quite look right, so I attacked it with some Testors Acryl Orange Gloss. As this was drying, I didn't like the pen stuff, so I decided to trim some of the fat and use some styrene to create a cannon holder as close to G1 as possible.
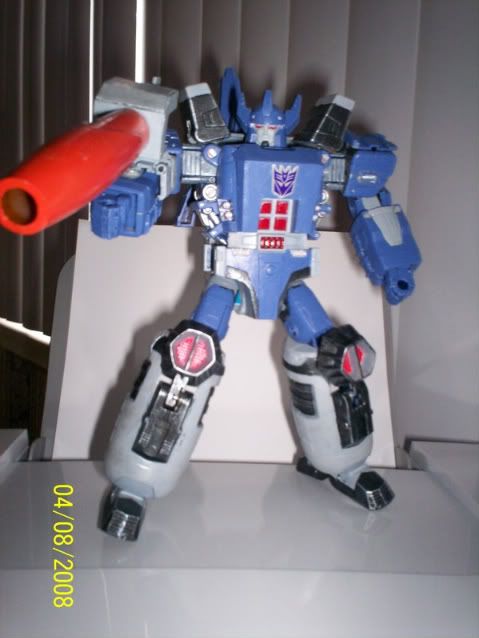
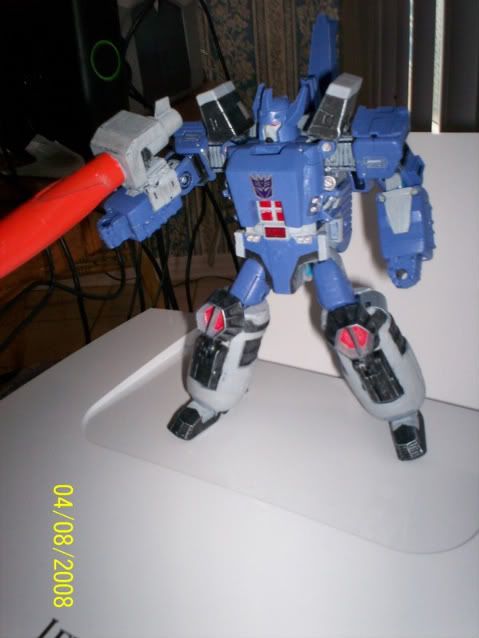
3) I didn't like the chest of the Energon Megatron figure--too rounded for my liking. So after painting it to see how it would come out, I realized that I could create a better chest with styrene. So I did......but once I got it all done, I painted it as a "test" to see how it would look (I still needed to sand it more, but I wanted to see if the shape of the chest was good). Didn't like it. So I decided to trim it down in a "v" type of shape--the sides angling in toward the middle of his abdomen area. It came out MUCH better, so I sanded and painted.
4) I didn't like the way the arms looked and took the forearms apart to see if it looked better. Didn't care for it either, so I tried to think of a way to make it better. I then realize that the underside of the arm is pretty similar to the G1 "toon-style" Galvatron forearm. So I take it apart, flip the fists inside, slap it together again and paint it up.
5) Didn't do much modding to the head--but I did take that middle "horn/crown" section and shave it down a bit with an X-Acto blade so it matched the thickness of the other two.
6) Raided my G1 Galvatron for the shoulder pads and glued them onto the shoulders of Energon Megatron (the shoulders still slide, with the glued shoulder pads intact).
7) I took my dremel and cut off the Energon Megatron shoulder pads (the ones that held his two cannons in place). Never liked 'em, so I was more than happy to hack 'em off.
8) I trimmed the back of the legs down a bit, since the legs wouldn't really be attaching to the old "wings" anymore with the new alternate mode I was working on.
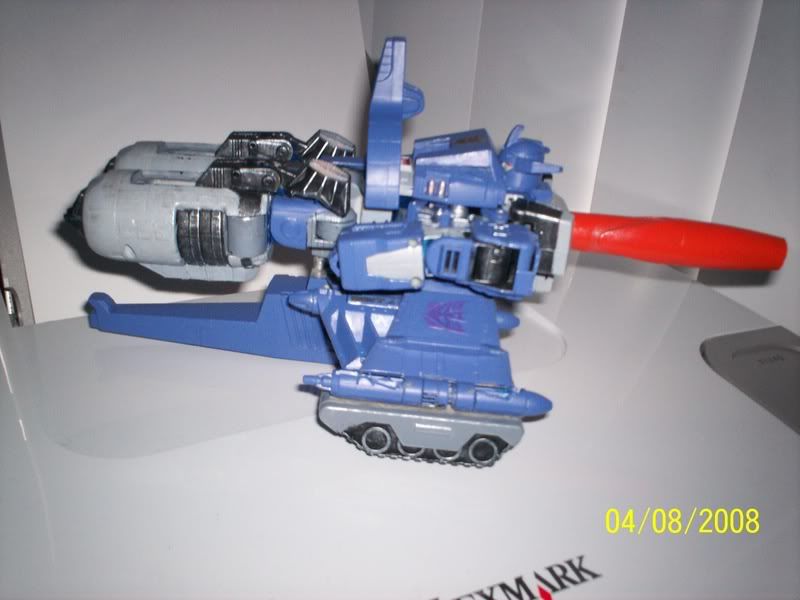
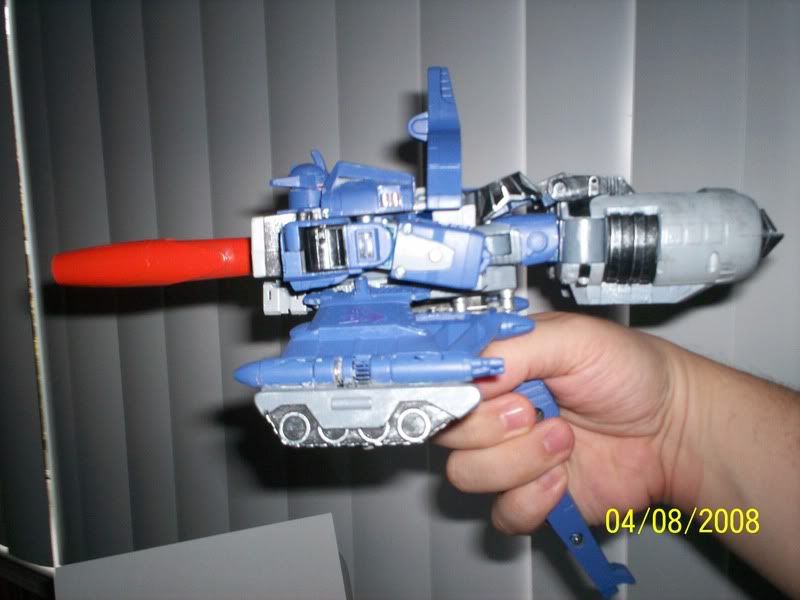
9) I used the G1 Galvatron "tripod/tail piece" to make him more G1-styled. I attached this with magnets so that it could easily be taken off if need be. This piece really doesn't move much, other than to rotate back up to his back in robot mode. The magnets helped give it the right height to fit with the tripod/tank treads.
10) I hacked up the "wing" section of Energon Megatron to use it as the tank treads on his tripod/cannon alternate mode. I dremeled out a section to allow room for the tail piece to fit perfectly with it. This is also attached by magnets, which allow you to leave it as-is on his back (which looks BAD, trust me) or remove it (again, parts-former!). I glued G1 Galvatron's original tank treads onto the bottom of the wing piece to give it a distinctive G1-feel.
11) Finally, the arm cannon slides neatly into the opening left when his head flips forward to allow him to transform.
ON WITH THE SHOW!
AND, for those that are wondering (and I know you are)...........
*UPDATE: links to a few more "action" type shots added below*
http://i2.photobucket.com/albums/y4/hXc ... 0_0902.jpg
http://i2.photobucket.com/albums/y4/hXc ... 0_0903.jpg
http://i2.photobucket.com/albums/y4/hXc ... 0_0904.jpg
http://i2.photobucket.com/albums/y4/hXc ... 0_0905.jpg
http://i2.photobucket.com/albums/y4/hXc ... 0_0906.jpg
Here's a quick run-down on what I used and what I did:
1) Paint (Testors Acryl Blue, Black Flat, Orange Gloss, Red Gloss, Light Ghost Gray, Silver Gloss, Gray, & a dark gray I mixed up.
2) For the G1 arm cannon, I used the back end of an oversized Bic pen (cut down and glued so you couldn't "click it" anymore). I used my dremel to cut the pieces off the bottom of the Energon Megatron electronic tank/cannon so that they could still "snap" into his arm. I glued them to a small piece and mounted the hacked up pen (well, the back end of it). I proceeded to go through 3 different arm cannons--two of which were created from various pens and the third. The 3rd and final cannon may look familiar--I took G1 Galvatron's arm cannon and cut off the end that used to slide into his head in alternate mode, then trimmed the other end of the cannon a bit so it wouldn't look too long or big. I considered keeping the G1 look to it (the clear/sparkly orange, but it didn't quite look right, so I attacked it with some Testors Acryl Orange Gloss. As this was drying, I didn't like the pen stuff, so I decided to trim some of the fat and use some styrene to create a cannon holder as close to G1 as possible.
3) I didn't like the chest of the Energon Megatron figure--too rounded for my liking. So after painting it to see how it would come out, I realized that I could create a better chest with styrene. So I did......but once I got it all done, I painted it as a "test" to see how it would look (I still needed to sand it more, but I wanted to see if the shape of the chest was good). Didn't like it. So I decided to trim it down in a "v" type of shape--the sides angling in toward the middle of his abdomen area. It came out MUCH better, so I sanded and painted.
4) I didn't like the way the arms looked and took the forearms apart to see if it looked better. Didn't care for it either, so I tried to think of a way to make it better. I then realize that the underside of the arm is pretty similar to the G1 "toon-style" Galvatron forearm. So I take it apart, flip the fists inside, slap it together again and paint it up.
5) Didn't do much modding to the head--but I did take that middle "horn/crown" section and shave it down a bit with an X-Acto blade so it matched the thickness of the other two.
6) Raided my G1 Galvatron for the shoulder pads and glued them onto the shoulders of Energon Megatron (the shoulders still slide, with the glued shoulder pads intact).
7) I took my dremel and cut off the Energon Megatron shoulder pads (the ones that held his two cannons in place). Never liked 'em, so I was more than happy to hack 'em off.
8) I trimmed the back of the legs down a bit, since the legs wouldn't really be attaching to the old "wings" anymore with the new alternate mode I was working on.
9) I used the G1 Galvatron "tripod/tail piece" to make him more G1-styled. I attached this with magnets so that it could easily be taken off if need be. This piece really doesn't move much, other than to rotate back up to his back in robot mode. The magnets helped give it the right height to fit with the tripod/tank treads.
10) I hacked up the "wing" section of Energon Megatron to use it as the tank treads on his tripod/cannon alternate mode. I dremeled out a section to allow room for the tail piece to fit perfectly with it. This is also attached by magnets, which allow you to leave it as-is on his back (which looks BAD, trust me) or remove it (again, parts-former!). I glued G1 Galvatron's original tank treads onto the bottom of the wing piece to give it a distinctive G1-feel.
11) Finally, the arm cannon slides neatly into the opening left when his head flips forward to allow him to transform.
ON WITH THE SHOW!
AND, for those that are wondering (and I know you are)...........
*UPDATE: links to a few more "action" type shots added below*
http://i2.photobucket.com/albums/y4/hXc ... 0_0902.jpg
http://i2.photobucket.com/albums/y4/hXc ... 0_0903.jpg
http://i2.photobucket.com/albums/y4/hXc ... 0_0904.jpg
http://i2.photobucket.com/albums/y4/hXc ... 0_0905.jpg
http://i2.photobucket.com/albums/y4/hXc ... 0_0906.jpg